Ubuntu下安装jekyll
Ubuntu下安装jekyll
何为jekyll
Jekyll是一个简单的静态网站生成器,用于生成个人,项目或组织的网站。 它由GitHub联合创始人汤姆·普雷斯顿·沃纳用Ruby编写,并根据MIT许可证发布。Jekyll不使用数据库 ,用户通过编写Markdown、Textile或Liquid文件, 生成一个完整的静态网站,并且可以由Apache HTTP Server , Nginx或其他Web服务器提供服务。Jekyll是GitHub Pages的引擎.
| [Jekyll • Simple, blog-aware, static sites | Transform your plain text into static websites and blogs (jekyllrb.com)](https://jekyllrb.com/) |
准备工作
在linux上安装 Jekyll 相当简单,但是你得先做好一些准备工作。开始前你需要确保你在系统里已经有如下配置。
windows 10系统下也可以用Ubuntu-WSL安装。
- GCC and Make (check versions using
gcc -v,g++ -v, andmake -v)- sudo apt install gcc g++ make
- Ruby(version 2.4.0 or higher, including all development headers (check your Ruby version using
ruby -v)- sudo apt-get install ruby-full build-essential zlib1g-dev
- RubyGems (check your Gems version using
gem -v)- sudo apt install rubygems
-
NodeJS, 或其他 JavaScript 运行环境(Jekyll 2 或更早版本需要 CoffeeScript 支持)。
- sudo apt install node npm
-
Python 2.7(Jekyll 2 或更早版本)
- sudo apt install python
用 RubyGems 安装 Jekyll
安装 Jekyll 的最好方式就是使用 RubyGems. 你只需要打开终端输入以下命令就可以安装了:
$ sudo gem install jekyll bundler
所有的 Jekyll 的 gem 依赖包都会被自动安装,所以你完全不用去担心
快速开始
$   jekyll new my-awesome-site

$   cd my-awesome-site

$   bundle install

$   bundle exec jekyll server

# => 打开浏览器 http://localhost:4000
显示效果

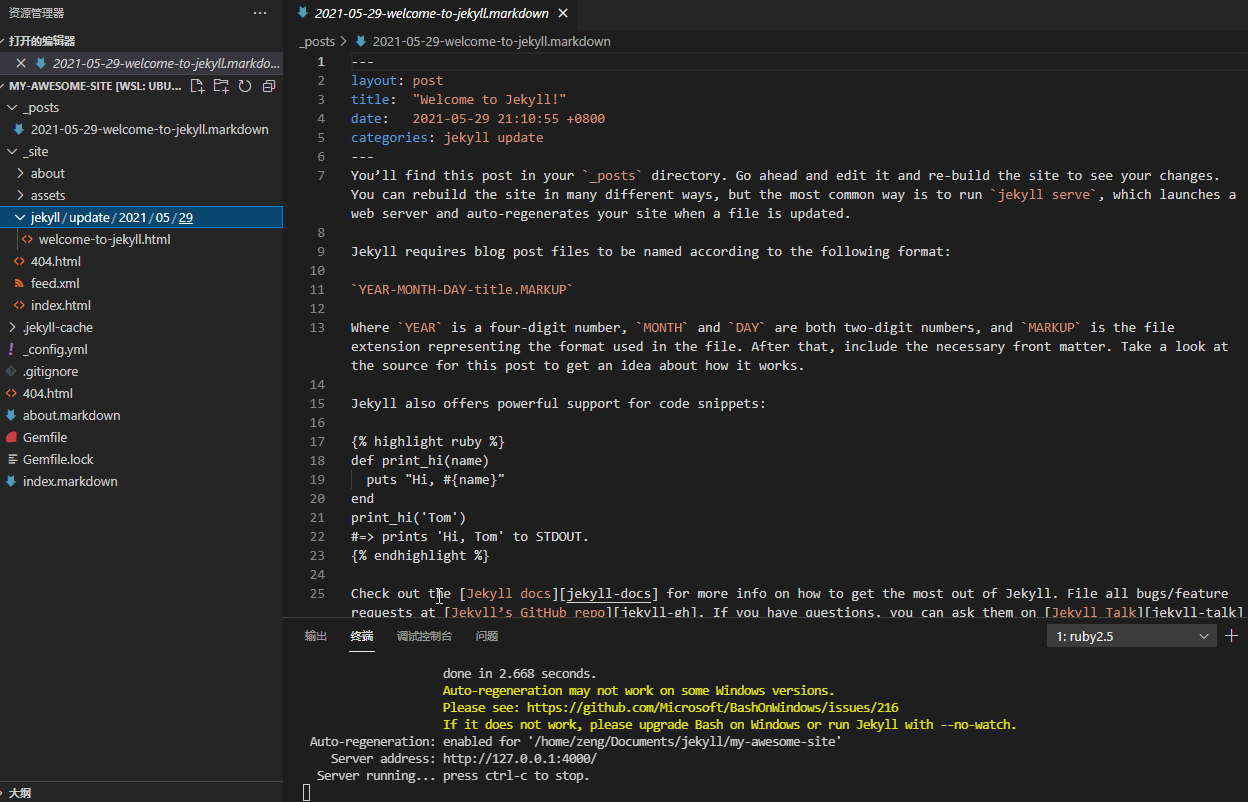
目录结构说明
You’ll find this post in your _posts directory. Go ahead and edit it and re-build the site to see your changes. You can rebuild the site in many different ways, but the most common way is to run jekyll serve, which launches a web server and auto-regenerates your site when a file is updated.
Jekyll requires blog post files to be named according to the following format:
YEAR-MONTH-DAY-title.MARKUP
Where YEAR is a four-digit number, MONTH and DAY are both two-digit numbers, and MARKUP is the file extension representing the format used in the file. After that, include the necessary front matter. Take a look at the source for this post to get an idea about how it works.

在_post目录下添加你要发表的博客文章,需要由YYYY-mm-dd-title.md格式命名的文件。jekyll会通过_config.yml和Gemfile两个配置文件在_site目录下生成对应的html文件,这样页面上就会在主页面按照时间顺序显示文章链接。如果你在其它地方添加了markdown或者html文件,jekyll也会生成html文件,它们会显示在页面的头部。如果只是草稿文件,可以在_config.yml的exclude配置中去掉对该文件或目录的监听。
gemfile配置
source "https://rubygems.org"
# Hello! This is where you manage which Jekyll version is used to run.
# When you want to use a different version, change it below, save the
# file and run `bundle install`. Run Jekyll with `bundle exec`, like so:
#
#     bundle exec jekyll serve
#
# This will help ensure the proper Jekyll version is running.
# Happy Jekylling!
gem "jekyll", "~> 4.2.0"
# This is the default theme for new Jekyll sites. You may change this to anything you like.
gem "minima", "~> 2.5"
# If you want to use GitHub Pages, remove the "gem "jekyll"" above and
# uncomment the line below. To upgrade, run `bundle update github-pages`.
# gem "github-pages", group: :jekyll_plugins
# If you have any plugins, put them here!
group :jekyll_plugins do
  gem "jekyll-feed", "~> 0.12"
end

# Windows and JRuby does not include zoneinfo files, so bundle the tzinfo-data gem
# and associated library.
platforms :mingw, :x64_mingw, :mswin, :jruby do
  gem "tzinfo", "~> 1.2"
  gem "tzinfo-data"
end

# Performance-booster for watching directories on Windows
gem "wdm", "~> 0.1.1", :platforms => [:mingw, :x64_mingw, :mswin]
如果你想要使用Github Pages,需要在该配置里注释掉 gem “jekyll”, 并去掉注释 gem “github-pages”, group: :jekyll_plugins。
github Pages 会选择自己使用的jekyll版本而无需指定。
_config.yaml 配置
title: Your awesome title
email: your-email@example.com
description: >- # this means to ignore newlines until "baseurl:"
  Write an awesome description for your new site here. You can edit this
  line in _config.yml. It will appear in your document head meta (for
  Google search results) and in your feed.xml site description.
baseurl: "" # the subpath of your site, e.g. /blog
url: "" # the base hostname & protocol for your site, e.g. http://example.com
twitter_username: jekyllrb
github_username:  jekyll

# Build settings
theme: minima
plugins:
  - jekyll-feed

# Exclude from processing.
# The following items will not be processed, by default.
# Any item listed under the `exclude:` key here will be automatically added to
# the internal "default list".
#
# Excluded items can be processed by explicitly listing the directories or
# their entries' file path in the `include:` list.
#
# exclude:
#   - .sass-cache/
#   - .jekyll-cache/
#   - gemfiles/
#   - Gemfile
#   - Gemfile.lock
#   - node_modules/
#   - vendor/bundle/
#   - vendor/cache/
#   - vendor/gems/
#   - vendor/ruby/
其它问题
Jekyll 运行的时候提示错误 cannot load such file – webrick (LoadError)
根据官方的项目的说明:
这是因为: 从 Ruby 3.0 开始 webrick 已经不在绑定到 Ruby 中了,请参考链接: Ruby 3.0.0 Released 中的说明。
webrick 需要手动进行添加。
添加的命令为:
bundle add webrick
后就可以解决这个问题了。
留下评论